Moving large appliances like washers and dryers requires more than just brute strength; it demands careful preparation to prevent damage to the machines and your home. Understanding “how to move a washer and dryer” correctly can save you from costly repairs or the expense of replacing a broken appliance. One of the most critical, yet often overlooked, steps for washers is securing the drum.
Without proper preparation, particularly for front-load washing machines, the internal components can shift and break during transit. This guide will walk you through the essential steps, from disconnecting and draining hoses to utilizing “washer transit bolts” and considering dryer venting. Knowing these details is vital, whether you’re doing a DIY move or preparing your appliances for appliance movers denver to handle.
💡 Key Takeaway: Proper preparation, especially securing the washing machine drum with transit bolts, is essential when moving a washer and dryer to prevent internal damage and ensure safe transport.
Preparing Your Washing Machine for Transport
1. Disconnecting and Draining the Washer
Before you even think about lifting, your washing machine needs to be completely disconnected and drained.
- Shut Off Water Supply: Locate the hot and cold water faucets behind the washing machine and turn them off completely.
- Disconnect Hoses: Using a wrench or pliers, carefully disconnect the hot and cold water inlet hoses from the back of the washer. Have a bucket or towels ready, as residual water will spill out.
- Drain Hoses: Allow the hoses to drain thoroughly into the bucket. It’s often helpful to lay the hoses flat or hang them over the bucket to ensure all water is out.
- Disconnect Drain Hose: Remove the drain hose from the standpipe or utility sink and from the back of the washer. Again, expect some water to come out.
- Clean and Secure Hoses: Coil the hoses and place them inside the washer drum or tape them securely to the back of the machine to prevent them from dangling or getting lost.
- Clean Detergent Dispenser: Remove and clean the detergent dispenser drawer to prevent mildew or leaks during transport.
2. Securing the Washer Drum with Transit Bolts
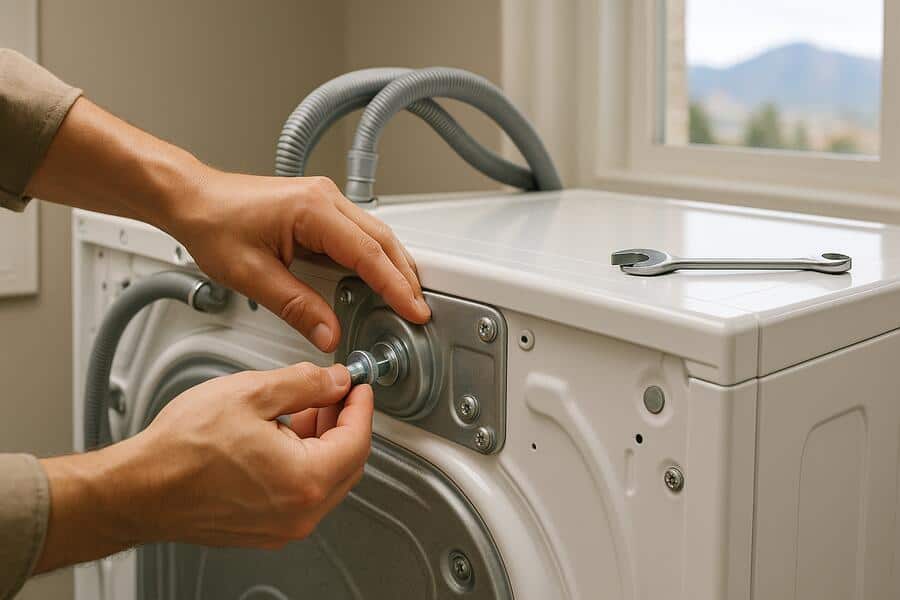
This step is absolutely critical for front-load washing machines and highly recommended for top-loaders with agitators to prevent damage to the drum and suspension system during transit. This is where “washer transit bolts” come in.
- What are Transit Bolts? These are bolts designed to lock the washing machine’s inner drum securely in place, preventing it from shaking or moving excessively during transport. This protects the delicate suspension system, springs, and bearings from damage.
- Locate and Reinstall:
- When your washing machine was originally delivered, it came with these transit bolts installed. They were typically removed during installation.
- You’ll usually find 2-4 holes on the back of the washer where these bolts were. You’ll need to locate your original transit bolts (they often come in a small bag with the owner’s manual).
- Insert the bolts into the holes and tighten them according to your appliance’s instruction manual. If you don’t have the original bolts, contact the manufacturer or a local appliance parts store for replacements.
- For Top-Loaders: Some top-load washers also benefit from having their drum secured. Check your owner’s manual for specific instructions. Sometimes, a simple cardboard insert or a piece of foam placed inside the drum can help.
- Importance: Moving a front-load washer without its transit bolts is a common mistake that can lead to severe internal damage, rendering the machine unusable.
💡 Key Takeaway: Thoroughly drain all water from your washing machine’s hoses and drum. Crucially, reinstall the “washer transit bolts” in front-load machines to lock the drum in place and protect its delicate suspension during the move.
Preparing Your Dryer and Safe Transport
3. Disconnecting the Dryer and Venting Considerations
Preparing your dryer is generally simpler than a washer, but still requires attention to detail, especially regarding its power and venting.
- Electric Dryers:
- Unplug the dryer from the wall outlet. Ensure it’s a dedicated 240-volt outlet (it will have a larger, often three or four-pronged plug).
- Coil the power cord and secure it to the back of the machine with tape or a bungee cord.
- Gas Dryers:
- This is a more complex and potentially dangerous disconnection. First, shut off the gas supply valve to the dryer.
- Carefully disconnect the flexible gas line. Be prepared for a slight odor of gas.
- It is highly recommended that a qualified professional handle the disconnection and reconnection of a gas dryer to prevent leaks and ensure safety.
- Disconnect the Vent Hose: Remove the large, flexible vent hose from the back of the dryer and from the wall vent. Clean out any lint accumulation inside the hose and the dryer’s vent opening.
- Secure Parts: Tape the vent hose opening on the dryer shut to prevent internal parts from shifting or dirt from getting in. Secure the vent hose to the dryer or pack it separately.
4. Moving and Transporting Both Appliances Safely
Once disconnected and secured, the physical “moving a dryer” and washer requires careful handling.
- Use an Appliance Dolly: Both appliances are extremely heavy and awkward. Always use a heavy-duty appliance dolly with straps. Tilt the appliance back onto the dolly and secure it tightly with the straps before attempting to move.
- Get Help: Never try to move a washer or dryer alone. Always have at least one, preferably two, strong helpers.
- Maintain Upright Position: Whenever possible, transport both the washer and dryer in an upright position. Tipping a washer on its side, even with transit bolts, can put undue stress on components. Dryers are more forgiving but still best moved upright.
- Protect Floors and Walls: Use moving blankets, furniture sliders, or sheets of cardboard to protect your floors from scratches and your walls from dings as you maneuver the appliances.
- Secure in the Moving Vehicle: Once on the moving truck, secure the appliances tightly against a wall of the truck using tie-down straps to prevent them from shifting or tipping during transit. Place moving blankets around them for added protection.
Washer & Dryer Moving Checklist
| Appliance | Preparation Steps |
|---|---|
| Washing Machine |
|
| Dryer (Electric) |
|
| Dryer (Gas) |
|
| Transport (Both) |
|
💡 Key Takeaway: Disconnect electric dryers by unplugging, gas dryers by shutting off the gas valve (ideally professionally). Always use an appliance dolly, get help, and secure both units upright in the moving truck for safe transport.
Conclusion
Successfully navigating “how to move a washer and dryer” involves more than just muscle; it requires meticulous preparation and attention to detail. From properly draining your washing machine and, critically, reinstalling its “washer transit bolts,” to carefully disconnecting your dryer’s power and vent (and gas line for gas models), each step is vital for preventing damage and ensuring a smooth relocation. Remember, these appliances are heavy and unwieldy, so always prioritize safety by using an appliance dolly, getting sufficient help, and securing them properly during transport. A little planning goes a long way in protecting your valuable laundry machines.
Have questions about how to moving a dryer? Reach out to our team today.
Frequently Asked Questions About Moving a Washer and Dryer
Do all washing machines need transit bolts?
Primarily, front-load washing machines require transit bolts to secure their inner drum and suspension system during transport. Top-load washers, especially older models, may not use them, but it’s always best to check your owner’s manual. Failing to use transit bolts on a front-loader can lead to significant internal damage.
Can I move a gas dryer myself, or should I hire a professional?
While you can physically move a gas dryer, the disconnection and reconnection of the gas line should ideally be handled by a qualified professional (like a plumber or appliance technician). Improper disconnection or reconnection can lead to dangerous gas leaks. If you’re uncomfortable or unsure, always err on the side of hiring a pro.
What if I lost my washing machine’s transit bolts?
If you’ve lost your original transit bolts, contact your washing machine’s manufacturer directly or visit a local appliance parts store. Provide them with your washer’s make and model number, and they should be able to help you order replacement parts. Do not attempt to move a front-load washer without these bolts.
Can I lay a washing machine on its side to move it?
It is generally not recommended to lay a washing machine (especially a front-loader) on its side. Doing so, even with transit bolts, can put strain on the internal components, suspension, and plumbing. Always try to transport a washing machine in an upright position. If tipping is absolutely unavoidable for a short period, consult your owner’s manual for manufacturer-specific guidance on which side is safest.