Moving a piano is arguably one of the most challenging tasks in any relocation. These magnificent instruments are not just heavy; they are also incredibly delicate, uniquely shaped, and hold immense sentimental and monetary value. Mishandling a piano can lead to severe damage to the instrument itself, your home, or serious injury to those attempting to move it. This is why professional piano moving services are almost always recommended. However, even with experts on the job, a significant part of the success lies in knowing “how to prepare a piano for moving.”
This guide provides a comprehensive “piano move checklist” to ensure everything is ready for the professionals. We’ll cover essential “piano moving prep” steps, including securing the piano’s internal and external components, meticulously clearing the moving path, taking precise measurements, and communicating critical details about your home’s layout to your movers in advance. By following these preparations, you’ll not only protect your piano but also streamline the entire moving process, making it safer and more efficient for everyone involved. For homeowners in the local area, enlisting experienced denver piano movers can provide the peace of mind that your instrument is in capable hands.
💡 Key Takeaway: Knowing “how to prepare a piano for moving” is critical, even with professional movers. A thorough “piano move checklist” involves securing the piano’s parts, clearing the path, precise measurements, and clear communication with movers about any challenges like stairs or tight corners. This “piano moving prep” ensures a safer, more efficient relocation.
Essential Piano Preparation Steps
1. Securing the Piano’s Components
Before any heavy lifting begins, the internal and external parts of your piano need to be secured. This is a fundamental part of “how to prepare a piano for moving.”
- Close and Lock the Keyboard Lid: This is paramount for preventing keys from shifting, breaking, or being damaged during transit. If your piano doesn’t have a lock, use painter’s tape or stretch wrap over the lid to keep it firmly closed. Avoid using strong adhesive tapes directly on finished wood surfaces.
- Secure Other Lids and Flaps: For upright pianos, ensure the top lid and fallboard (the piece that covers the keys) are securely closed. For grand pianos, carefully lower and secure the top lid, often with special latches or straps.
- Protect Pedals and Legs (Grand Pianos): Grand piano pedals are typically disconnected and wrapped. The legs of a grand piano are usually removed for moving. Ensure any hardware for reassembly is carefully labeled and stored in a secure bag.
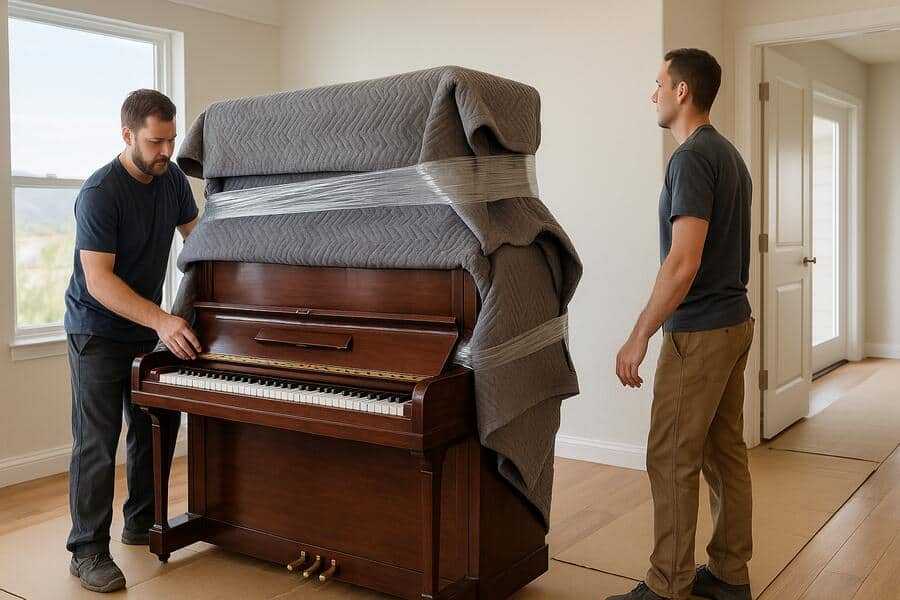
- Wrap the Entire Piano: Once internal components are secured, the entire piano should be wrapped in heavy-duty moving blankets. Use multiple layers, especially around corners and edges, and secure the blankets tightly with stretch wrap or wide packing tape (applied only to the blankets, not the piano surface). This protects against scratches, dings, and dust.
2. Clearing and Preparing the Moving Path
A clear, unobstructed path is crucial for the safety of your piano, your home, and the movers. This is a major item on any “piano move checklist.”
- Walk the Route: Mentally or physically walk the entire path from the piano’s current location to the exit of the home, and then from the entry point of the new home to its final resting spot. Identify any potential obstructions or tight spots.
- Remove Obstacles: Clear all furniture, rugs, decor, potted plants, and anything else that could impede the path. Even small items can cause a trip hazard for movers carrying an immense load.
- Open Doors: Prop open all doors along the route. For very tight doorways, consider removing the doors from their hinges to gain an extra inch or two of clearance. However, always consult with your movers first, as some prefer to handle this themselves.
- Protect Floors and Walls: Lay down floor protection (cardboard runners, plywood, or heavy-duty moving blankets) on hardwood, tile, or delicate carpeted surfaces. Pad any sharp wall corners, banisters, or door frames with blankets or foam to prevent dents and scratches to your home.
💡 Key Takeaway: “How to prepare a piano for moving” starts with securing all components: lock the keyboard lid, secure other lids, and protect pedals and grand piano legs. Follow this “piano move checklist” by thoroughly clearing the path of obstacles, propping open or removing doors, and protecting all floors and walls to ensure a safe and efficient move.
Measurements, Communication, and Final Checks
3. Precise Measurements of Piano and Passageways
Accurate measurements are the backbone of successful “piano moving prep,” preventing last-minute logistical nightmares.
- Measure the Piano: Obtain the exact height, width, and depth of your piano at its widest points. For grand pianos, also note the length from the keyboard to the tail.
- Measure All Passageways: Measure the clear width and height of all doorways, hallways, and stairwells along the moving path.
- Doorways: Measure between the door frame, not including any trim.
- Stairwells: Measure the width at the narrowest point (accounting for banisters). Also, measure the height of the ceiling, especially at landings and turns, to ensure vertical clearance.
- Turns/Corners: Measure the dimensions of any landings or tight corners where the piano will need to be pivoted. Ensure there’s enough space to maneuver.
- Measure Truck/Trailer Opening: If you’re arranging the transportation, measure the opening and internal clearances of the moving vehicle to confirm the piano will fit.
4. Communicating Challenges and Final Checks
Open communication with your movers is vital, especially when dealing with unique home layouts or “piano moving prep” concerns.
- Inform Movers in Advance: Share all details about stairs (number of flights, type of stairs, any tight turns), narrow hallways, uneven terrain, or any other logistical challenges well before moving day. Provide photos or videos if possible. This allows them to bring appropriate equipment (e.g., piano skid boards, ramps, extra manpower).
- Point Out Obstacles: On moving day, walk through the route with the lead mover to point out any specific concerns, delicate flooring, or areas needing extra protection.
- Secure Valuables: Before the movers arrive, remove any small or valuable items from on top of or near the piano.
- Discuss Reassembly: Confirm with your movers if they will reassemble the legs of a grand piano or unwrap the instrument in its new location.
Piano Moving Preparation Checklist
| Category | Action Items | Notes |
|---|---|---|
| Piano Securing | Lock keyboard lid, secure other lids/flaps, protect pedals/legs (grand), wrap entire piano with blankets/stretch wrap. | Use painter’s tape/stretch wrap if no lock. Label grand piano leg hardware. |
| Path Clearance | Remove all furniture, rugs, decor. Prop open/remove doors. Protect floors/walls. | Consult movers before removing doors. Clear trip hazards. |
| Measurements | Measure piano (HWD), doorways, hallways, stairwells (width & height), turns/landings. | Add a few inches for blankets and hands. Confirm truck clearance. |
| Communication | Inform movers of stairs/challenges. Point out delicate areas. Confirm reassembly. | Provide photos/videos if possible for complex situations. |
💡 Key Takeaway: For effective “piano moving prep,” meticulously measure your piano and all passageways, including doorways, hallways, stairwells, and turns. Critically, communicate all challenges, like stairs or tight spaces, to your movers in advance, providing details and photos if possible. On moving day, review the route with them and confirm reassembly expectations.
Conclusion
Preparing a piano for movers is a critical component of a safe and successful relocation. By diligently following this “piano move checklist”—securing the instrument’s components, meticulously clearing and protecting the moving path, taking precise measurements, and maintaining open communication with your chosen piano movers—you play an active role in safeguarding your valuable instrument. These “piano moving prep” steps not only protect your piano and home from potential damage but also ensure a smoother, more efficient experience for the professional movers, allowing your piano to arrive at its new home in perfect harmony.
Have questions about how to how to prepare a piano for moving? Reach out to our team today.
Frequently Asked Questions About Preparing a Piano for Movers
What are the first steps I should take “how to prepare a piano for moving”?
The first steps in “how to prepare a piano for moving” involve securing its internal components. Close and lock the keyboard lid to protect the keys. If there’s no lock, use painter’s tape or stretch wrap to keep it closed. For grand pianos, secure the lid and prepare for leg removal, carefully labeling any hardware. Then, wrap the entire piano in moving blankets, securing them with stretch wrap.
What should I do to the moving path as part of my “piano move checklist”?
As part of your “piano move checklist,” you must thoroughly clear the moving path. Remove all furniture, rugs, decor, and any other obstacles from the path leading out of your old home and into your new one. Prop open all doors, and for tight doorways, consider removing doors from their hinges (after consulting with your movers). Lay down floor protection on delicate surfaces and pad any sharp wall corners or banisters.
Why are measurements so important when doing “piano moving prep”?
Measurements are crucial for “piano moving prep” to prevent costly damage and ensure a smooth move. You need to measure your piano’s exact dimensions (height, width, depth) and the clear width and height of all doorways, hallways, and stairwells. This information helps movers plan their strategy, bring appropriate equipment, and confirm that the piano can actually fit through the intended path, especially if there are tight turns or multiple flights of “piano stairs.”
Should I tell my “denver piano movers” about stairs or tight spots in advance?
Absolutely, it is critical to inform your “denver piano movers” about any stairs, tight turns, narrow hallways, or other logistical challenges well in advance of moving day. This allows them to allocate enough manpower, bring specialized equipment (like piano skids or stair climbers), and formulate a safe plan. Providing photos or videos of challenging areas can be very helpful for their planning.