The kitchen, often considered the heart of the home, can quickly become the most overwhelming room to pack during a move. With its myriad of fragile dishes, sharp utensils, bulky appliances, and endless pantry items, mastering “how to pack a kitchen” requires a strategic approach. Without a clear plan, you risk broken items, disorganization, and a lot of unnecessary stress on moving day. It’s not just about putting things in boxes; it’s about protecting your investments and ensuring a smooth setup in your new home.
This comprehensive guide will walk you through expert “kitchen packing tips,” breaking down the process into manageable stages. We’ll start with the rarely used items, move on to small appliances and pantry staples, and finally, help you curate that all-important last-day essentials box. By following this order and applying proper techniques for “packing kitchen items,” you’ll not only safeguard your belongings but also streamline your unpacking process. Remember, opting for professional packing services for moving can also significantly ease this burden.
💡 Key Takeaway: Learning “how to pack a kitchen” effectively is crucial for a smooth move. Start with rarely used items, then tackle appliances and pantry staples, always keeping an “essentials” box for the last day. Proper “kitchen packing tips” involve careful wrapping and strategic boxing to protect fragile “packing kitchen items” and simplify unpacking.
Strategic Kitchen Packing: From Rarely Used to Essentials
1. Starting with the Seldom-Used Items
The key to efficient “packing kitchen items” is to start early and strategically. Begin with items you don’t use daily.
- Decor and Specialty Cookware: This includes decorative bowls, vases, holiday-themed dishes, large platters, specialty bakeware (like Bundt pans or soufflé dishes), and appliances you only pull out for specific occasions (e.g., waffle maker, stand mixer if you rarely bake).
- Upper Cabinets and High Shelves: These areas often store items that are not part of your daily routine. Tackle these first to clear out space and gain momentum.
- Collect Packing Supplies: Before you begin, gather all necessary supplies: sturdy boxes of various sizes, packing paper (lots of it!), bubble wrap, packing tape, markers, and possibly dish packs for extra fragile items.
- Cull and Declutter: As you go through each cupboard and drawer, take the opportunity to declutter. Donate or discard items you no longer use, are broken, or are duplicates. Don’t pay to move things you don’t need or want.
2. Packing Dishes, Glassware, and Small Appliances
These “packing kitchen items” require extra care to prevent breakage during transit.
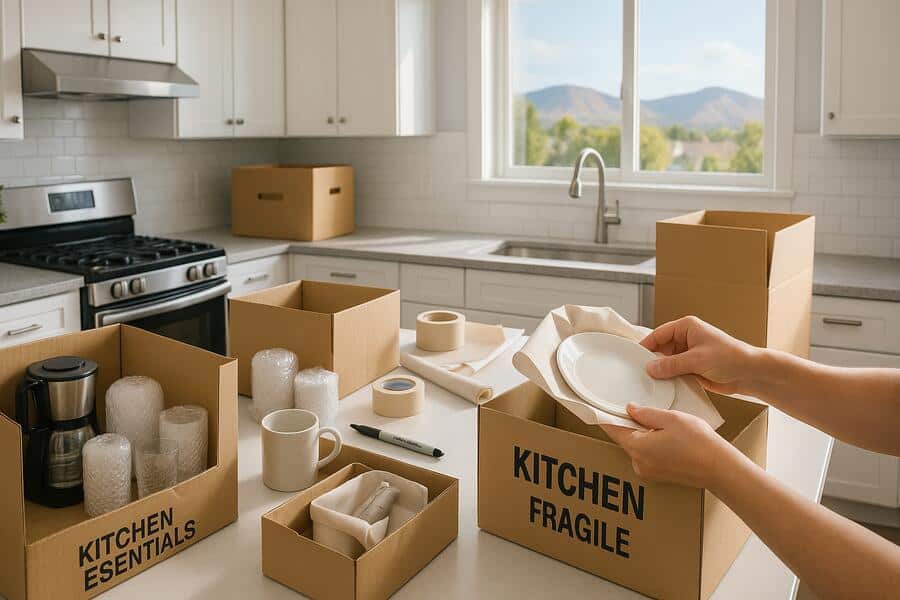
- Plates and Bowls: Wrap each plate individually with packing paper, then stack them vertically (like records) in a sturdy box. Vertical stacking provides more shock absorption. Cushion the bottom and top of the box with crumpled paper.
- Glassware and Mugs: Wrap each glass or mug individually. For stemware, wrap the stem first, then the bowl. Place them in partitioned boxes (like dish packs) or create compartments with cardboard. Pad generously.
- Cutlery: Bundle a few knives together, wrap them tightly in several layers of packing paper, and secure with tape. Place them upright in a sturdy box, ensuring sharp edges are covered. Pack other cutlery in bundles or in their original trays, cushioned with paper.
- Small Appliances: If you have original boxes, use them. Otherwise, wrap small appliances like toasters, blenders, and coffee makers in bubble wrap or moving blankets. Fill any empty spaces in the box with crumpled paper to prevent shifting. Label the box clearly, indicating if it’s “fragile.”
💡 Key Takeaway: When learning “how to pack a kitchen,” begin with rarely used “packing kitchen items” like specialty cookware and decor, using it as an opportunity to declutter. For fragile items like dishes and glassware, wrap each piece individually and pack plates vertically. Small appliances should be well-cushioned and labeled, following these “kitchen packing tips” to prevent damage.
Pantry, Perishables, and the Essentials Box
3. Organizing the Pantry and Non-Perishables
The pantry can be surprisingly time-consuming, but with good “kitchen packing tips,” it can be efficient.
- Discard Opened/Expired Items: Toss any opened food containers that might leak, and certainly anything expired. Moving food that is unlikely to survive the trip or that you won’t use isn’t worth it.
- Seal Liquids: For unopened bottles of oils, vinegars, or sauces you intend to move, place them in sealed plastic bags to contain any potential leaks. Pack these upright in sturdy boxes, surrounded by other non-fragile items or crumpled paper.
- Canned Goods and Dry Goods: Canned goods are heavy, so pack them in small, sturdy boxes. Dry goods like pasta, rice, or cereal can remain in their original packaging, placed in medium-sized boxes. Use sealable plastic bags for any opened dry goods to prevent spills.
- Spices: Group spices together in a small box, ensuring lids are tight. You might place them in a plastic bin first for extra security.
4. Dealing with Perishables and the Essentials Box
The last few days before the move and the first day in your new home require careful planning for food and immediate needs.
- Plan Meals: In the week leading up to the move, plan meals that use up perishable foods from your refrigerator and freezer. Aim to have minimal perishable items left on moving day.
- Transporting Perishables (Short Distances): For very short local moves, you might transport a small amount of refrigerated items in a cooler with ice packs. Pack directly from the fridge/freezer into the cooler. Keep raw meats separate. Always prioritize food safety, maintaining temperatures below 40°F. For longer moves, it’s generally best to discard or donate perishables.
- The Kitchen Essentials Box: This is arguably the most important box for “how to pack a kitchen.” Pack items you’ll need immediately upon arrival at your new home:
- Coffee maker, coffee, mugs, sugar
- A pot or pan, a few plates, utensils for everyone
- Paper towels, dish soap, sponge
- A small cutting board and knife (carefully wrapped)
- Basic non-perishable snacks
Label this box clearly as “Kitchen Essentials” and ensure it’s loaded last and unloaded first.
Kitchen Packing Stages Summary
| Packing Stage | Items to Pack | Key “Kitchen Packing Tips” |
|---|---|---|
| Weeks Before Move | Rarely used appliances, specialty dishes, decor. | Declutter, gather supplies, wrap fragile items securely. |
| 1-2 Weeks Before Move | Main dishes, glassware, everyday appliances, pantry items. | Wrap individually, stack plates vertically, seal liquids, use small boxes for heavy items. |
| Last Few Days/Moving Day | Perishables, essentials for first 24 hours. | Eat down perishables, use coolers for short moves, create a clearly labeled “Essentials Box.” |
💡 Key Takeaway: When “packing kitchen items,” discard opened or expired pantry goods, and seal any liquids in plastic bags. Plan meals to deplete perishables before moving day. Critically, prepare a “Kitchen Essentials Box” with immediate necessities like coffee, basic utensils, and cleaning supplies, ensuring it’s easily accessible in your new home.
Conclusion
Mastering “how to pack a kitchen” might seem like an insurmountable task, but with a systematic approach, it’s entirely achievable. By starting early with rarely used items, carefully protecting your fragile dishes and appliances, organizing your pantry efficiently, and thoughtfully planning for perishables and immediate needs, you can transform a chaotic chore into an organized process. These “kitchen packing tips” will not only safeguard your belongings but also ensure a smoother transition, allowing you to quickly get your new kitchen up and running in your new home.
Have questions about how to how to pack a kitchen? Reach out to our team today.
Frequently Asked Questions About Packing a Kitchen
What’s the best order to follow when learning “how to pack a kitchen”?
The best order to “pack a kitchen” is to start with items you use least frequently, such as seasonal dishes, specialty appliances, or rarely used decor. Next, move on to everyday dishes, glassware, and most pantry items. Finally, on moving day, pack your last-minute essentials and address any remaining perishables. This phased approach helps you maintain functionality in your kitchen for as long as possible.
How should I pack fragile “packing kitchen items” like dishes and glassware?
For dishes, wrap each plate or bowl individually with packing paper, then stack them vertically (on their sides) in a sturdy box, cushioning the top and bottom. For glassware, wrap each piece individually and either place them in partitioned dish packs or create compartments with cardboard, ensuring generous padding. Always use sturdy boxes and fill any empty spaces with crumpled paper to prevent shifting.
What should I do with perishable food items from my refrigerator and freezer?
In the week leading up to your move, plan meals to gradually use up perishable foods. On moving day, it’s generally best to consume, donate, or discard any remaining perishable items, especially for long-distance moves. For very short local moves, you might transport a minimal amount in a cooler with plenty of ice packs, ensuring food safety by keeping items below 40°F.
What items are essential for my “Kitchen Essentials Box” when moving?
Your “Kitchen Essentials Box” should contain items you’ll need immediately upon arriving at your new home. This typically includes a coffee maker, coffee, mugs, a few plates, basic utensils for everyone, a pot or pan, dish soap, a sponge, paper towels, and a small cutting board with a carefully wrapped knife. Label this box clearly so it’s the first one you open.