Moving a chest freezer might seem straightforward at first glance, but these large appliances present unique challenges that can lead to damage if not handled correctly. Unlike smaller items, a chest freezer is bulky, heavy, and contains delicate internal components that require specific preparation. Simply unplugging it and hauling it away can lead to issues with its compressor, cooling system, and even its exterior finish. The goal is not just to get it from point A to point B, but to ensure it arrives in working order, ready to serve your household for years to come.
This guide will walk you through the essential steps for “moving a chest freezer” safely and efficiently. We’ll cover everything from emptying and defrosting, to securing the lid and ensuring it remains upright during transport. Following these “freezer moving” and “moving a deep freezer” tips is crucial to protect your appliance and your investment. For those who prefer to leave heavy lifting and specialized appliance handling to the professionals, experienced appliance movers denver can provide the expertise needed to manage such a move with confidence.
💡 Key Takeaway: “Moving a chest freezer” requires careful preparation to protect its delicate components and exterior. Key steps include emptying and defrosting, securing the lid, and maintaining an upright position during transport. Following these “freezer moving” guidelines is crucial to prevent damage and ensure the appliance functions correctly in its new location.
Essential Pre-Move Preparation for Your Chest Freezer
1. Emptying and Defrosting: Critical First Steps
This is arguably the most time-consuming yet crucial step when “moving a chest freezer.”
- Disconnect Power: First, turn the temperature control to “OFF” and unplug the freezer from the wall outlet. This should be done at least 24-48 hours before the move to allow for complete defrosting.
- Remove All Food: Transfer all frozen food items to insulated coolers, insulated bags, or other freezers. Use ice packs or dry ice to keep contents frozen if transport time is significant. For local moves, towels and newspapers can provide temporary insulation in corrugated boxes.
- Thorough Defrosting: Allow all ice and frost to melt completely. This prevents water from spilling during the move and reduces the overall weight of the freezer. You can speed up the process by placing pans of hot water inside the freezer, but avoid using sharp objects to chip away ice, as this can damage the lining.
- Clean and Dry: Once defrosted, clean the interior thoroughly with a mild soap and water solution, then wipe it completely dry. Any residual moisture can lead to mold, mildew, or unpleasant odors in transit.
2. Securing the Lid and Internal Components
Once empty and defrosted, protecting the freezer’s structure is the next priority for “freezer moving.”
- Secure the Lid: Use strong packing tape or rope to secure the lid of the chest freezer firmly in place. This prevents it from accidentally opening during transit, which could damage the hinges or the lid itself. Be careful not to apply tape directly to painted surfaces if it might damage the finish upon removal; use moving blankets underneath the tape if necessary.
- Remove or Secure Loose Parts: If your chest freezer has removable baskets or dividers, take them out and pack them separately. If they are not removable, secure them in place with tape or bungee cords to prevent them from shifting and causing damage during the move.
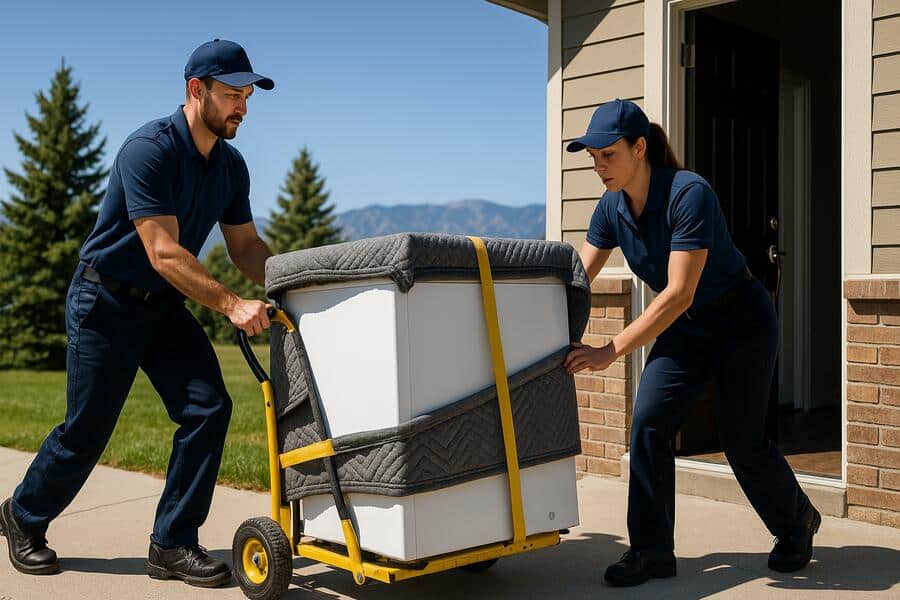
- Protect the Exterior: Wrap the entire chest freezer in moving blankets or appliance pads. Secure these coverings with stretch wrap or more packing tape. This protects the exterior finish from scratches, dents, and dings, especially when navigating tight doorways or hallways.
💡 Key Takeaway: Preparing for “moving a chest freezer” starts by unplugging it 24-48 hours prior to fully empty, defrost, and dry its interior. Next, secure the lid with tape or rope, remove or fasten any internal baskets, and thoroughly wrap the entire freezer in moving blankets to protect its exterior during “freezer moving.”
Moving and Post-Move Care
3. Maintaining an Upright Position During Transport
This is perhaps the most critical rule for “moving a deep freezer.” The internal workings are sensitive to tilting.
- Why Upright Matters: Freezers contain compressor oil and refrigerant that need to remain in specific areas of the cooling system. Laying a freezer on its side, even for a short period, can cause the oil to drain into the refrigerant lines. This can block the lines, preventing the compressor from working correctly or causing it to burn out.
- Use an Appliance Dolly: Always use a heavy-duty appliance dolly with straps to move a chest freezer. This allows it to be kept upright throughout the entire loading and unloading process.
- Secure in Vehicle: When loading into a moving truck or trailer, ensure the chest freezer is securely strapped in an upright position. Use ratchet straps to prevent any shifting or tipping during transport. Pack other items around it to brace it further.
- Limited Tilting: If tilting is absolutely unavoidable (e.g., to get through a very narrow doorway for a very short distance), try to limit it to no more than a 45-degree angle. Immediately return it to an upright position.
4. Post-Move Waiting Period Before Plugging In
Even if you’ve kept it upright, a waiting period is crucial for “moving a chest freezer.”
- The Waiting Game: After the freezer arrives at its new location, keep it in an upright position for at least 2-4 hours, and ideally longer (up to 24 hours), before plugging it in. This allows any compressor oil that might have shifted during the move to flow back into its proper reservoir.
- Longer for Tilting: If the freezer had to be tilted significantly or laid on its side for any portion of the move, extend this waiting period to 24 hours or more to be safe.
- Leveling: Once in its final spot, ensure the freezer is level. Most chest freezers have adjustable feet for this purpose. A level freezer operates more efficiently and quietly.
- Test Run: After the waiting period, plug it in and let it run empty for a few hours to ensure it reaches the correct temperature before restocking with food.
Chest Freezer Moving Checklist
| Phase | Action Item | Important Notes |
|---|---|---|
| Pre-Move Prep (1-2 days out) | Unplug, empty all food, defrost completely, clean & dry interior. | Use coolers for food. Avoid sharp objects for defrosting. Ensure no moisture remains. |
| Securing & Protecting | Secure lid with tape/rope, remove/fasten loose internal parts, wrap exterior with blankets/pads. | Tape over blankets if worried about finish. Label and pack loose parts separately. |
| Moving Day Transport | Use appliance dolly, keep upright, secure firmly in moving vehicle. | Critical for compressor health. Limit tilting to max 45 degrees if unavoidable. |
| Post-Move Care | Leave upright for 2-4 hours (up to 24 if tilted) before plugging in. Level freezer. | Allows oil to settle. Essential for proper function and longevity. Test empty. |
💡 Key Takeaway: During “moving a deep freezer,” always use an appliance dolly and keep it in an upright position to protect its compressor and cooling system. After arrival, allow the freezer to remain upright for at least 2-4 hours (longer if tilted) before plugging it in, ensuring proper internal fluid settlement and an efficient restart.
Conclusion
“Moving a chest freezer” successfully requires more than just brute strength; it demands careful planning and adherence to specific guidelines. By thoroughly emptying and defrosting, securing all components, and crucially, keeping the appliance upright during transport, you safeguard its delicate internal mechanisms. The final, often overlooked step of allowing it to rest in its new location before plugging it in ensures its longevity and proper function. Following these “freezer moving” and “moving a deep freezer” practices will help ensure your valuable appliance continues to serve you reliably for many years to come.
Have questions about how to moving a chest freezer? Reach out to our team today.
Frequently Asked Questions About Moving a Chest Freezer
How far in advance should I empty and defrost my chest freezer before “moving a chest freezer”?
You should aim to empty and defrost your chest freezer at least 24 to 48 hours before “moving a chest freezer.” This allows ample time for all the ice and frost to melt completely and for you to clean and thoroughly dry the interior. Removing all moisture prevents spills during transport and reduces the risk of mold or odors developing.
Why is it so important to keep the freezer upright during “freezer moving”?
It is critically important to keep the freezer upright during “freezer moving” because its compressor contains oil and refrigerant. Tilting or laying the freezer on its side can cause this oil to seep into the refrigerant lines, potentially blocking them. This blockage can prevent the compressor from functioning correctly, leading to inefficiency or even complete failure of the appliance.
What should I do to the freezer lid and any internal baskets before “moving a deep freezer”?
Before “moving a deep freezer,” you should firmly secure the lid with strong packing tape or rope to prevent it from opening accidentally during transit. If there are any removable baskets or dividers, take them out and pack them separately. If they are fixed, secure them in place with tape or bungee cords to prevent them from shifting and causing internal damage.
How long should I wait after “moving a chest freezer” before plugging it back in?
After “moving a chest freezer,” you should wait at least 2 to 4 hours before plugging it back into power. If the freezer had to be tilted significantly or laid on its side for any part of the journey, it’s best to extend this waiting period to 24 hours. This allows any compressor oil that may have shifted to settle back into its proper place, preventing damage to the cooling system.