There’s nothing quite like the allure of a pool table in a finished basement: a dedicated space for recreation, family fun, and entertaining friends. However, the dream can quickly turn into a logistical nightmare if not approached correctly. The challenge of “moving a pool table to basement” is unique, primarily due to the sheer weight and awkward dimensions of the table, especially the heavy slate pieces. Many homeowners underestimate the complexity involved, risking damage to their home, the table itself, or even serious injury. This isn’t a task for the faint of heart or the unprepared.
This guide will demystify the process of “moving a pool table to basement,” providing essential insights into careful planning and execution. We’ll cover everything from precise measurements of stairwells and crucial turns, to the meticulous process of carrying slate pieces separately, and finally, how to plan the space around the table for optimal play. Understanding these details is critical for a successful “basement pool table install.” For those who prefer to leave this specialized task to the experts, professional slate pool table movers have the experience and equipment to handle such a delicate operation.
💡 Key Takeaway: “Moving a pool table to basement” is a complex task due to its weight and size, particularly the slate. Success hinges on meticulous planning, including precise measurements of stairwells and turns, carefully moving individual slate pieces, and strategic room layout for a proper “basement pool table install.”
Pre-Move Planning: Measurements and Disassembly
1. Critical Stairwell and Turn Measurements
The success of “moving a pool table to basement” often comes down to the inches. Precise measurements are non-negotiable.
- Stairwell Width: Measure the clear width of your stairwell at its narrowest point. Don’t forget to account for any protruding banisters, newel posts, or handrails, which can significantly reduce usable width. You’ll need enough room for the slate pieces and the people carrying them.
- Ceiling Height: Measure the height of the stairwell, especially at any landings or turns. You need adequate vertical clearance, particularly when tilting slate slabs or the main frame.
- Landing Dimensions: Crucial for navigating turns. Measure the length and width of any landings. You need enough space to pivot the longest or widest piece of the pool table (which will usually be the slate or the main frame) without hitting walls or ceilings.
- Doorway Clearances: Measure all doorways leading to the basement and into the final room. Include the width, height, and any diagonal clearance if the door can be removed.
- Practice Run (Optional but Recommended): If possible, cut out a cardboard template of the largest piece of slate or the main frame and try to maneuver it through the tightest spots. This visual aid can prevent costly surprises.
2. Understanding Pool Table Disassembly for Basement Moves
Unlike regular furniture, a pool table is designed to be disassembled. This is key for “moving pool table to basement.”
- Rails First: The side rails are typically removed first. They are heavy and bulky and need to be protected.
- Pockets and Cloth: Pockets are usually detached next. The cloth (felt) will need to be carefully un-stapled or un-glued if the slate is being removed. This is a delicate process and often requires professional re-felting later.
- Slate Pieces: Most quality pool tables use multiple pieces of slate (usually three). These are incredibly heavy (150-300+ lbs each) and must be moved individually. They are usually screwed to the main frame and sealed with beeswax or plaster. Care must be taken to remove them without damage.
- Main Frame/Body: Once the slate is off, the wooden frame can be moved. While lighter than the slate, it can still be awkward and requires multiple people.
- Labeling and Protecting: As you disassemble, label all parts and hardware. Wrap each component, especially the rails and legs, with moving blankets and stretch wrap to prevent scratches and dings.
💡 Key Takeaway: Before “moving a pool table to basement,” meticulously measure stairwell width, ceiling height, and landing dimensions, accounting for all obstructions. Understanding that a pool table must be disassembled—rails, pockets, cloth, and then the heavy individual slate pieces—is crucial. Labeling and protecting all components during disassembly are essential “pool table stairs” tips.
Executing the Move and Installation
3. Safely Carrying the Slate Pieces Separately
The slate is the heart of the pool table and the most challenging component of “pool table stairs” transport.
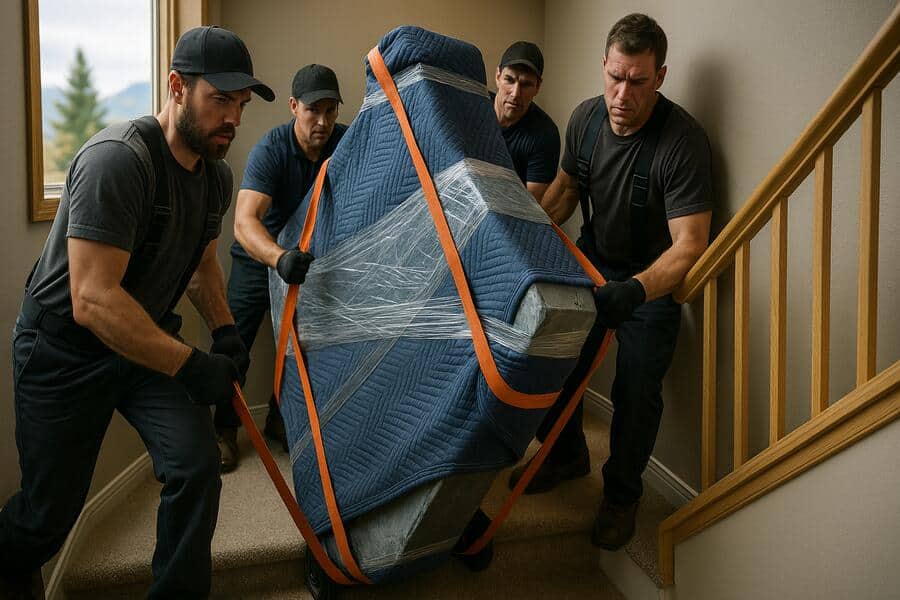
- Multiple Movers: Each slate piece requires at least two, often three or four, strong movers. Their weight is deceptive, and their smooth, brittle nature makes them prone to breakage if dropped or twisted.
- Specialized Equipment: Movers often use specialized dollies, harnesses, or slings designed for heavy, flat objects. Never attempt to carry slate alone or without proper equipment.
- Maintain Flatness: Slate should ideally be carried flat or with minimal tilting. Excessive flexing can cause it to crack. When navigating turns, it’s often necessary to tilt, but this must be done slowly and carefully, with excellent communication between all carriers.
- Protect Edges: The edges of the slate are vulnerable. Ensure they are protected with cardboard, foam, or blankets, especially when maneuvering around doorframes or stair railings.
- Clear Path: The path from the truck to the basement must be entirely clear of obstacles, debris, and tripping hazards.
4. Planning the Room Space Around the Table
A “basement pool table install” isn’t complete without ensuring adequate playing space. This involves more than just the table’s footprint.
- Cue Clearance: The most crucial factor. You need enough clear space around all sides of the playing surface to comfortably take a full stroke with a standard 57-58 inch cue. As a rule of thumb, add at least one full cue length to each side of the table’s *playing surface* dimensions.
- Table Size vs. Room Size:
- 7-Foot Table (3.5′ x 7′ playing surface): Typically requires a minimum room size of around 13′ x 16′ (for a 58″ cue).
- 8-Foot Table (4′ x 8′ playing surface): Requires approximately 13.5′ x 17.5′ (for a 58″ cue).
- 9-Foot Table (4.5′ x 9′ playing surface): Needs about 14.5′ x 18.5′ (for a 58″ cue).
Remember these are minimums; more space is always better.
- Obstacles: Factor in pillars, support beams, built-in bars, or other furniture. Even if they don’t impede the table’s footprint, they can interfere with cue clearance.
- Lighting: Plan for overhead lighting that illuminates the entire playing surface evenly, without casting shadows.
Pool Table Room Size Guide
| Table Size | Playing Surface (Approx.) | Minimum Room Size (with 58″ cue) |
|---|---|---|
| 7-Foot (Bar Box) | 39″ x 78″ | 13′ 4″ x 16′ 10″ |
| 8-Foot (Standard) | 44″ x 88″ | 13′ 10″ x 17′ 10″ |
| 9-Foot (Pro/Tournament) | 50″ x 100″ | 14′ 4″ x 18′ 4″ |
💡 Key Takeaway: For “pool table stairs” maneuvering, each slate piece requires multiple strong movers and specialized equipment, maintaining flatness to prevent cracks. For a successful “basement pool table install,” ensure ample cue clearance (a full cue length on all sides of the playing surface) around the table, accounting for minimum room dimensions based on table size and any room obstacles.
Conclusion
“Moving a pool table to basement” is a task that demands careful planning, precision, and physical effort. From meticulously measuring your stairwell and breaking down the table into its components, to safely transporting the incredibly heavy slate pieces and ensuring ample playing space in its new home, every step is crucial. Attempting this without the right knowledge, tools, and manpower can lead to costly damage or injury. By adhering to these guidelines, you can transform your basement into the recreational haven you’ve envisioned, enjoying your pool table for years to come.
Have questions about how to moving pool table to basement? Reach out to our team today.
Frequently Asked Questions About Moving a Pool Table to a Basement
Is it possible to “move a pool table to basement” without disassembling it?
No, it is almost never possible to “move a pool table to basement” without complete disassembly. Pool tables, especially those with slate beds, are extremely heavy and bulky. They are designed to be broken down into their frame, legs, rails, and individual slate pieces for safe and manageable transport, particularly when navigating “pool table stairs” or tight turns.
How heavy are the slate pieces, and what’s the safest way to carry them down “pool table stairs”?
Slate pieces are incredibly heavy, typically ranging from 150 to over 300 pounds each, depending on the table size and slate thickness. For safe transport down “pool table stairs,” each piece requires at least two, often three or four, strong individuals. They should be carried as flat as possible, using specialized moving straps or slings, with constant communication and extreme caution to prevent flexing or dropping, which can cause irreparable cracks.
What key measurements do I need to take for “moving pool table to basement”?
Crucial measurements for “moving pool table to basement” include the clear width of your stairwell (accounting for banisters/handrails), the ceiling height at all points and landings, and the dimensions of any landings or turns. You also need to measure all doorways. These measurements must accommodate the largest component of your disassembled pool table, usually the individual slate pieces or the main frame.
How much room do I need around the pool table for a comfortable “basement pool table install”?
For a comfortable “basement pool table install,” you need to ensure adequate “cue clearance” around the playing surface. As a general rule, add at least the length of a standard 57-58 inch cue to each side of the table’s playing dimensions. For example, a 7-foot table (approx. 3.5′ x 7′ playing surface) needs a room roughly 13′ x 16′ to allow for full cue strokes without hitting walls or obstacles.